One of the biggest advantages of using Windows 7, 8 or 8.1 is that you can make a virtual hard drive. These hard drives are similar to your general hard drives and help you organize all of your documents and files. Hence, users love to make a virtual hard drive in order to keep the important documents separate from the other ones and increase the space in the general hard drive too.
If you don’t know how to expand a Virtual Hard Disk, follow the steps written below.
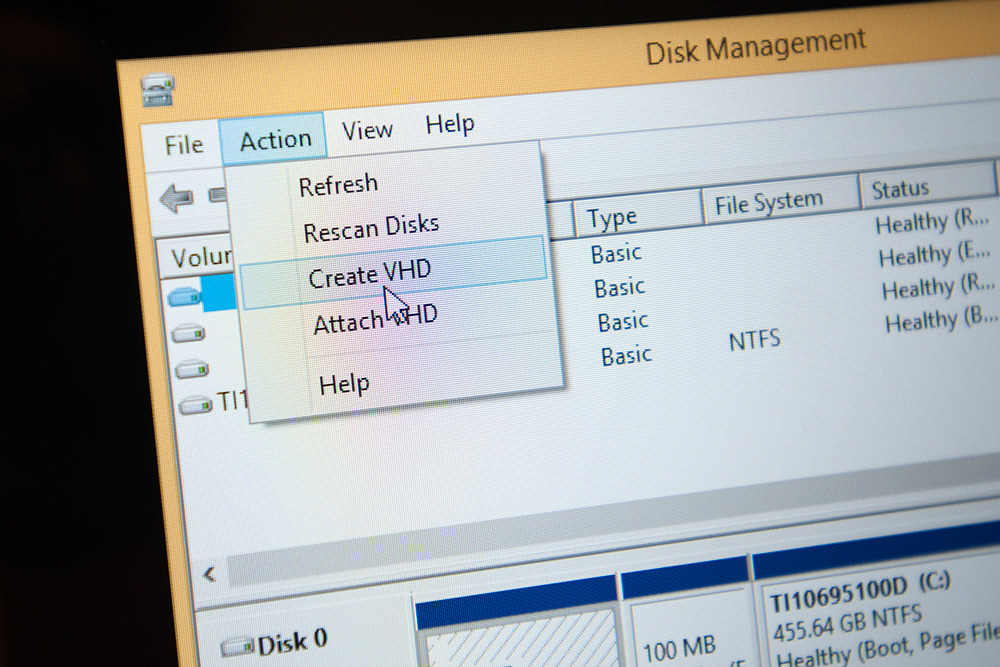
- Run the disk management in windows
The first step to creating a virtual hard drive is to go to the control panel. There, you can either press Win + X or click on the start, type the diskmgmt.msc in the run box and press OK. After reaching the disk management menu, you need to find the Action and click on ‘create a Virtual hard drive’. This will run the command and you will need to go to the second step.
- Select the features of the virtual disk
Once you have followed the first step successfully, it leads you to the second step. Here you can select the various features related to the virtual disk. First of all, you need to select the location. Then, the size of the disk. It is important to keep the size above 3 MB. Also, you will find the available format of the disk there, which needs to be selected. Finally, you can press OK after completing all the settings and a new disk gets created. However, this disk still requires the activation command in order to increase virtual hard drive space.
- Activate the newly created disk
In order to activate the virtual disk, you need to first do a right click on the icon of the disk. Then, you can click on the initialize disk option in order to activate the disk. However, there is more to it! You need to give the specifications regarding the partition style you require. For instance, it can be MBT (Master Boot Record), or GPT (GUID partition table). However, for home computers, the MBR option provided in the GPT would be beneficial in order to get more than 4 partitions. But you need to have more than 2 terabytes of disk space.
Once you have selected the style, it is time to connect your hard drive with the Windows operating system. Here you need to click right and reach the New Simple Volume option. Finally, you can select a letter name for the hard drive through which you can view it.
So, this the way to do the Virtual Machine disk expansion. The steps are simple and require no excess effort. Hence, you can easily do it on your own and enjoy the expanded disk space on your computer.
Hopefully, this article will help you create a virtual hard drive and organize your system. However, for better assistance, you can get in touch with professionals.